EPIDERMAL NERVER FIBER DENSITY TEST
ENFDSKIN BIOPSY
THE COMPLETE GUIDE
Throughout the design process, we collaborate with each client to gain an understanding of their unique needs – defining the success of each building.
Choose an area to biopsied and cleanse it with an alcohol swab or providone-iodine solution. Administer 1%-2% lidocaine with epinephrine using a 30 gauge needle for anesthesia, but avoid injecting directly into the biopsy site.
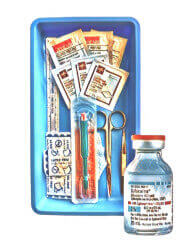
1. Preparation
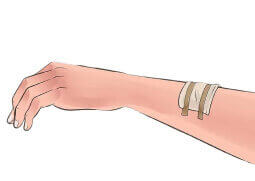
For the area selected for the biopsy, identify the lines of the least skin tension. Stretch the skin around the biopsy site with your non-dominant hand perpendicular to these lines
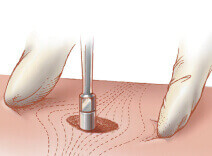
2. Identify Lines of Skin Tension
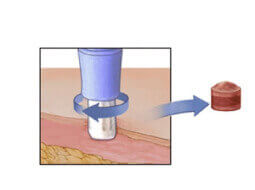
Hold the 3mm punch biopsy instrument vertically over the skin, rotating it downward using a twirling motion with your dominant hand. Continue until the instrument has penetrated the dermis into the subcutaneous fat, then remove it.

3. Perform the Biopsy
Elevate the cylindrical skin specimen using the provided forceps. If necessary, use scissors to cut the specimen free from the subcutaneous tissues, making sure the cut is below the dermis level.
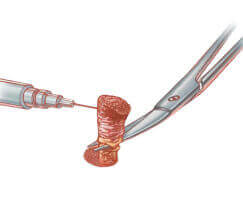
4. Remove Specimen
Handle the specimen carefully, grabbing only the skin edge to avoid crushing the tissue. Place the specimen in the provided fixative, secure it, and mail immediately.
5. Specimen Handling and Preservation
Use the provided 2x2 sterile gauze to stop the initial bleeding and cover the biopsy site with a band-aid.
6. Bleeding Management
Keep the biopsy site clean, avoiding submersion in water for at least 24 hours. Change the bandage at least once a day or if it becomes wet or damp.
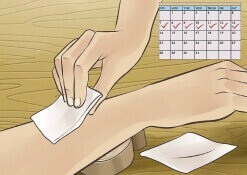
7. Post-Biopsy Care
PLACE AN ORDER
OrderBiopsy Kit


Contact Us
-
Head office
20505 Crescent Bay Drive
Lake Forest, CA 92630 - Phone: +1-(800) 961-6999
- Email address hello@mammoth-dx.com